
Are you preparing to build an external wall? You may have needed to resurface the ceiling. You may need to call an expert plasterer right away! As the name suggests, plasterers are skilled craftspeople who have a vast knowledge of all things plaster. Plasterers can assist with the construction, restoration, and construction of walls, ceilings and floors. They also have the capability to construct exterior walls and decorative components.
It is important to know what type of of plasterer you need before you begin your search. Good plasterers are hard to find, but if you’re looking for a quality job at a reasonable rate, it is important to hire a professional. It is the same with experienced craftsmen. D. White Plastering offers a variety of Plaster Painting Services.
Plastering can be classified into two categories: fibrous and strong plastering. Plastering techniques with plaster finishes and that are robust can be used for surfaces like walls, floors, and driveways. This classification also includes protective layers such as pebbledash on exterior walls. Fibrous plastering, the alternate term for decorative plastering, is also sometimes used. This would include the creation of ceiling roses or decorative columns, which usually involves the use moulds. A plasterer will often work with an interior or exterior designer on this type of project because of the importance of design.
If you want to fix a problem, go to a home improvement store and find all the materials, tools, and products that you need. You may believe you can handle DIY projects if you are even a little bit interested. You should start working after watching some video tutorials on the Internet. You can’t be serious, can you?
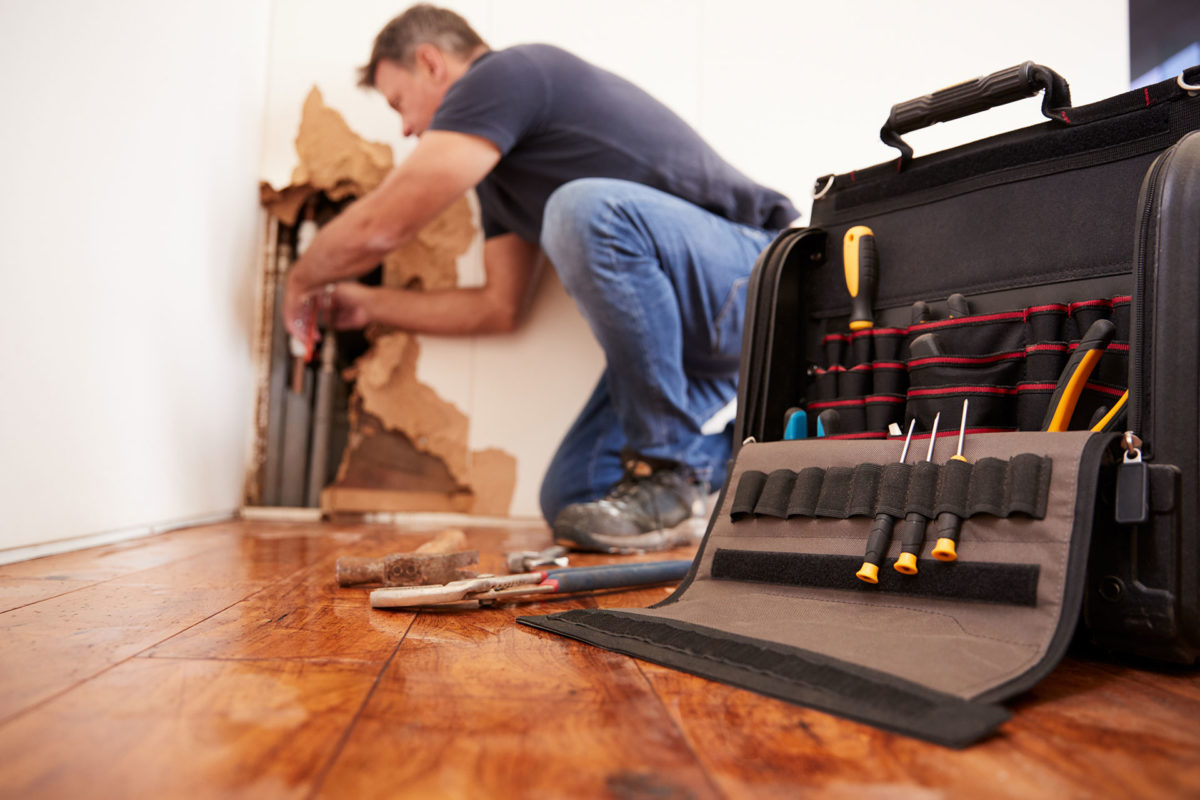
Ask anyone who has attempted to repair plaster damage themselves and they will say that they regret their decision. This isn’t like drywall where you have to mix the compound first before applying it on the surface. Is far more elaborate. If you look at the ornamental crown moldings and plaster ceilings in your home, you should be able tell. Plaster has many unique features that are not found in buildings constructed recently. It is this uniqueness that gives it its charm.
What are the advantages of hiring an expert to complete a D.I.Y. Task?
You might be tempted if you need to plaster a small area such as a garage outside, where the aesthetics do not matter. If you’ve had previous experience plastering, this is particularly true. Plastering is a physically demanding task that also requires high-level expertise. Most home owners are not able to handle more complex tasks.
If you don’t have any experience plastering, or are not confident in your abilities, it is best to let the pros handle this task. You will save time and money, and the surface will be much better. If it’s not, tell them that you want it to be improved. A plasterer has years of experience, knowledge and will often be able finish a job much faster than you.
They will also give you peace of mind. Keep in mind, too, that the job you wish to complete may require special tools or knowledge you don’t possess. You would be able to contact a professional plasterer if something went wrong with your plastering job two months after completion. Hiring a plasterer is an advantage over doing the job yourself. It is a huge advantage to hire a plasterer over doing it yourself.
What qualifications/accreditations should you look for?
To ensure the best quality of information and strategies, it is important to hire a professional quality plasterer in Dartford. Plasterers have many credentials. However, a newly qualified Plasterer should possess either an NVQ (NVQ Level 1, 2, or 3) in Plastering or a SVQ level 3 in Plastering. Other credentials are also acceptable.
Plasterers who have more experience usually hold advanced City & Guild certificates in plastering, in addition to completing 8, 5, or three years of apprenticeship. In addition to the CSCS card, plasterers working on a construction or building site must also hold a BCAAS card (Building and Construction Ability Accreditation Scheme Card). The holder of this card has been adequately trained in a variety of health and wellness techniques, and is a skilled practitioner.
Some of the experienced plasterers may have learned their trade through apprenticeship programmes in the past, before the newer credentials were introduced. A plasterer in this situation will need to have many years of experience and excellent recommendations from previous customers.
Expense
Unfortunately, plasterers do not charge a standard rate per hour. The price is usually broken into two parts, the hourly rate of labour and the cost for the products purchased. Some plasterers will charge an job cost . This may be a better deal because they are not motivated to finish the job quickly.
The price of a job can vary greatly depending on a number of factors, including the experience of the plasterer, the location, the overhead costs of the plasterer (including whether they use an assistant or material) and the type. It is important to get multiple bids due to the wide range of potential expenses.
At least three estimates are recommended. Before hiring a plasterer to complete a major project, it is important to obtain a written quote that includes a breakdown of the cost. The final cost must not differ by a large amount from what is listed in this guide, assuming no unexpected problems arise.
How to Paint a Room: Secrets the Pros Won’t Tell You
Sand away flaws
If you want to paint walls, ceilings and woodwork that are completely smooth, it is important to start with a smooth surface. One industry expert suggested that Sander was a better job title than Painter because he spent a lot of time moving around sandpaper. You can smooth out spackling compounds and drywall joints by sanding them with abrasive papers. You can also feather out any repair work to blend in with the surface. Sanding painted trim such as window and door casings and baseboard mouldings removes rough spots and burrs from the wood surface. Sanding a smooth, shiny surface with fine-grit paper can improve the adhesion to the new paint.
Sand vertically, starting from the baseboards and moving up to the ceiling. Use a sanding rod that is fitted with 220 grit sandpaper. You should slightly overlap your strokes to avoid missing any areas while painting. The sanding should be done horizontally along the top of baseboard moulding and along the tops the walls to the ceiling. Do not apply too much pressure to the sanding rod, as it could cause the head to turn over and damage the wall. If you apply too much pressure to the sandpaper it will tend to pile up and create an obstruction.
Sanding sponges can be used to sand ornamental woodwork. They are flexible, and they can fit into small spaces without losing their shape.
Purchase only the best supplies
You should not cut corners on paint and brushes. It is a waste to use cheap brushes. Spending money on high-quality brushes and taking good care of them will ensure that they last a lifetime. You can give the appearance that you have smeared the paint on the walls with a rake if you use a $3 plastic brush. The bristles can also become loose and fall into paint. Wooster and Purdy are good brands to invest in. These brushes are slightly more expensive, but last much longer and apply paint better. Paintbrushes of high quality with a 2 1/2 inch width are a great choice. The brush can be used in a number of ways and can be cleaned to reuse it once the bristles are worn down.
Another important step is to invest in the best paint you can afford. The paint will be easy to apply, provide the best protection, and last a long time. You can also remove fingerprints using a simple washing without having to first remove the paint. Painting will be much easier and quicker, and the final product will look better.
Cover furniture
Don’t worry about moving all the furniture before you paint the room. Tape the bottom edge of plastic sheets to the floor and move the furniture into the center of the room. This will protect your furniture from paint splatters and drips as well as the dust created by sanding.
Usage tinted primer
Joint compound is used by professionals to fill in any holes or cracks before painting the wall. If you paint over the patches, the compound will pull the moisture out of the paint and give it a flat, dull appearance. This problem is called “flashing.” The appearance of these sections will also be distinct from the rest of your wall. Prime the wall before painting the final coat. This will stop the patches from showing through.
Professionals apply the primer directly from the can, and then tint it using a small amount grey paint or the color of the final paint. The tinted primer does a much better job at concealing and masking previous paint colours than the clear primer. The final coat will appear more vibrant and require less coats. It is particularly important to use a tinted prime before painting red or orange. These colours may require up to three topcoats. You will have to paint these colours over if you don’t use a primer.
Press a tape with a putty knife
Painter’s Tape is essential for every painting project, but especially when it comes to masking wood trim. It is frustrating to peel off the painter’s tape, only to discover that the paint has bled right through and is all over your trim. It is essential to adhere the tape properly before beginning the painting process. This will reduce the possibility of having to remove errant paint.
After application, press down the tape firmly onto the wood trim with a putty blade to create a solid seal. The paint won’t run. Use real painter’s tape and not masking. Masking tape leaves behind a sticky residue that is difficult to remove. Paint can cause masking tapes to wrinkle and break, allowing them to leak onto surfaces underneath. Painter’s tape can be left in place for up to two weeks without becoming difficult to remove.
Paint extender – reduced brush and roller marks
The presence of lap marks on the final coat indicates that the paint was not applied by a professional but rather, a novice. Paint extender (also known as paint conditioner) like Floetrol is essential to achieve a smooth finish free of brushwork or lap marks.
It accomplishes both goals:
It slows down the drying rate of the paint, giving you time to paint areas that were recently painted. This will prevent the appearance of lap marks that are left when new paint is applied over paint that has dried.
Paint extender makes it almost impossible to see brushstrokes. Paint extenders are used by the best painters to paint anything, from woodwork to drywall and cabinets to doors.
The label of the paint can tell you how much extender is needed. In general, eight ounces are required for each gallon. If the paint is thicker than usual or you’re painting in conditions that resemble winter, add more extender up to 16 ounces. D. White Plastering offers a variety of Dartford Plaster Painting
Scrape a ridge in textured ceilings
When painting the top of the wall of a room with a textured roof, it is difficult to avoid paint getting on the bumps. They have a simple solution: Use a screwdriver tip with a slot to smooth the texture on the ceiling. Work your way around the perimeter. The screwdriver leaves a slight ridge on the ceiling. Your paintbrush bristles will naturally fill in this ridge. Now you can cut around the ceiling and not worry about paint getting on it. You won’t be able notice the texture is gone.
Use canvas drop cloths
Ankle, flooring, leg, footwear, design, material, residential or commercial property
It is not a good idea to follow the lead of professional painters who use old bedsheets for ground cloth when painting . Even thin sheets will allow splatters to get through and end up on your floor. Also, avoid using any plastic sheeting. Plastic sheeting can cause paint to spill, but the drying time will be significantly longer. If you walk around with wet paint, it will track all over your home. When wet paint is painted on smooth plastic surfaces, it becomes very hazardous.
Use what the professionals use, canvas dropcloths. Canvas drop cloths are not only more expensive but they also absorb splatters and are durable enough to last for a lifetime. You don’t need to use a large drop cloth if you won’t be painting the ceiling. Protecting the floor with a canvas fabric that’s only a few feet wide and runs the length of the walls is ideal.
Finish one wall before starting another
Do-it-yourselfers often begin by cutting out all the corners of the room before returning to paint the walls. This is not the right way to paint. Experts achieve a smooth look by cutting into a wall first and immediately rolling on paint before the cut in areas have had a chance dry. The areas painted with a brush and those painted with a roller will blend together perfectly.
While you are switching between rolling and brushing, cover your paint tray or bucket with a wet towel. This will prevent the paint and other equipment from drying out.
Do not tape windows, but scrape them (don’t tape).
It is not necessary to tape around the window grill and frame before painting. This takes too long, and paint gets on the glass nearly every time. Try this tried and true method instead: As you paint the window, let some paint drip from the brush onto the glass. Once it’s dried, you can remove it easily with a razor scraper. Be careful not to cut the paint bond between the wood and glass. If this is not done, moisture will seep into the wood and eventually cause it to rot.
Box paint for a consistent coloor
What happens if you buy two or more paint cans in the same exact shade? The cans almost never contain the exact same colour. The paint colour varies from can to can. You may notice a slight but noticeable difference between two gallon cans if you open one in the middle on a wall. Boxing paint is the term used by professionals to describe the process of combining their individual cans into a pail of 5 gallons to achieve a uniform color throughout the project. You can then paint directly from the bucket. This eliminates the need for you to pour the paint first into a tray. You can paint directly out of the larger bucket.
Purchase an extra bucket or 2
It’s a good idea to keep several fresh paint pails around for painting, as freshly shaken paint does not stay this way for very long. If paint has settled you will not be able revive it using a stir stick. You’ll have to move the paint between buckets in order to mix the solids at the bottom. This is the best and only way to ensure that paint is mixed properly. If you have several paint containers, combine them all to get a uniform color.
Wash roller covers
It is important to thoroughly clean the paint roller covers before you use them. It is important to do this before every use. Pre-washing will remove the loose fuzz particles that are sure to come off once you begin painting. Preconditioning is a technique that involves running your hands along the roller covers after washing them with water and liquid soap. This will remove any loose fibers. The roller covers don’t need to be dried before they can be used. You can use them immediately.
Take off these electric plates
This is something that everyone should already know. You don’t need to spend time masking or cutting switch plates and outlet plates. Just unscrew them. Then, paint around the electrical components neatly and efficiently. Make sure that you have enough screws for the cover plates to be reconnected once the paint is dry.
Offer yourself a good set
A “bad set” is the jargon used by painters to describe being physically uncomfortable while painting. For example, the ladder may be too far away or you might find yourself in an awkward paintbrush position. With the right precautions you can avoid the majority of bad sets. The ladder can be moved by simply getting down and moving it. It is certainly annoying, but it’s not as bad as falling into the bucket of paint while holding your ladder. Moving the problem to another location can often improve the quality of a set that was otherwise not up to par. Stop what you’re doing if the refrigerator is blocking your path while you paint.
Light it up
You should also become familiar with the term “vacation” as a painter. You may miss out on an opportunity when this occurs. This is easy to do in rooms that have poor lighting or colours that are similar. It is therefore important to purchase a bright, good-quality work light to use to check your work, either as you are working, or once you have completed a section. Vacations are usually reserved for the areas that were painted with a paintbrush rather than a roller. While you are still at work, it’s easy to fit in holidays, but after you have finished cleaning and putting away everything, they can be a major nuisance.
Clean Dirty Walls with Degreaser
Paint will not adhere to surfaces that are greasy, dirty, or dusty. Examples include areas like the areas around light switches where unclean hands have slapped them. Before painting, use a degreaser on the area to remove any grease. Degreasers (also known as degassers) are solvents which cut through grime and grease to improve paint adhesion to surfaces. Because these products are potent, you must read the labels and follow the instructions. Wearing rubber gloves and eye protection is also recommended.
Start with a loaded brush
Professional painters use the “load and move” method when painting. They load the bottom 1 1/2 inches of their bristles, then tap the brush on the inside of the paint can to remove any excess paint. The brush is now ready to paint.
The other strategy is called “load and dump”. This involves dipping the brush in the paint and dragging the bristles along the side of the container to remove the most paint. This results in a paintbrush that is too dry and does not have enough paint.
Put up paint to avoid run
You can easily make drips or runs when you paint if you apply too much paint to the corners of the room or the wood trim. You’ll soon realize this is true if you begin by painting the corners of the room. To avoid these issues, start brushing about 1/2 inch away from where the cut was made. If you are painting trims or corners, drag the brush slowly and move it to a better position.
As the bristles press on the wall-to-wall cutout, apply a gentle pressure. You may need to repeat the process several times to ensure complete coverage. However, this will prevent paint from gathering along the woodwork or in the corners. D. White Plastering has a wide range of Dartford Plaster Painting
Bag it up
If you’re ready to stop painting but you haven’t finished, leave the roller-cover on the frame. Then soak it in paint. The paint will be evenly distributed. Before wrapping the cover, place it in a plastic bag to create an hermetic seal. The roller cover will remain clean until the next day when you are ready to paint again. If you are not going to be painting again for several days, take the roller cover off the frame and throw it away. Replace the roller cover next time with a new one.
When using latex water-based paint, rinse your brushes with warm water mixed with dish soap. Paint thinner is recommended to remove oil-based latex paint. Brush combs should be used to remove the bristles. The brushes can then be stored in their original cases or wrapped in paper.


Comments