Learn how to tile walls and transform a room with color, pattern, or fantastic layout. The tiles are also a practical option, as they protect walls from moisture and splashes and make it easy to keep the area clean.
You can tile a wall yourself if you prefer. Once you know the correct way to grout tiles, you can achieve a stylish result.
You can follow these steps to get the best results from your bathroom or kitchen tile ideas. We’ve also asked experts for tips on achieving professional results.
How to Tile a Wall
You must ensure the walls you are tiling are waterproof, smooth, and strong enough to hold your tiles.
Amanda Telford, CTD tiles (opens in a new tab), explains that if your surface is uneven, you can use a tile backing board to provide an even surface. This will make the fitting process much more manageable. The feeling you tile on must support the weight of all the tiles, grout, and adhesive.
You’ll need
- Metal ruler
- Tile scourer
- Tile nipper
- Fine sandpaper
- Grout float
- Grout finishing tool
- Bucket
- Drill with mixing paddle attachment
- Tile adhesive spreader
- Pencil
- Tape measure
- 5mm floor tile spacer
- Long carpenter’s level
- Sponge
- Timber batten
- Fixings
Prepare a Wall for Tiling
If you renovate a room, you may have to remove the wall tiles before tiling. Carol Butsko, vice president of Artistic Tile (opens in a new tab), explains that any painted wallboard must be removed.
The same goes for wood-based panels such as particleboard, wafer board, or oriented strand boards (OSB).
There are many backing boards: select the one best suited for the tile and application. The manufacturer will provide instructions on how to apply the backer board to the metal or wood studs. TCNA (opens in a new tab) Tile Council of North American Handbook for Ceramic, Glass, and Stone Tile Installation provides selection guides for different types of tile and materials for installation.
It’s Important To Mix The Tiles Up To Avoid Color Disparities
Plan the look you want your tiles to have. Test out patterns by laying them out on the floor. Mixing tiles from different boxes will allow you to blend texture, color, and pattern nicely.
Decide on your starting point.
When tiling a shower or tiling a floor, it’s crucial to determine the starting point. Create a tile gauge by using a wooden batten. Mark each tile using the wooden batten. Place the batten on the floor next to the row of tiles with spacers between them.
When measuring the wall horizontally, find the midpoint. Align the first line of the tile gauge to it. Mark by mark, and move the meter left until the wooden batten reaches the corner of the walls. Mark the wall at the end of the last tile and draw the line up to the ceiling using a carpenter’s level.
The corner where the battens intersect is your starting point.
Place the whole tiles.
Use a notched spreading tool to cover a portion of the wall with adhesive. The tile should be applied firmly, with a slightly twisted motion. Repeat the process with the remaining tiles, inserting spacers in between them.
Using the wooden batten, and a carpenter’s caliper, ensure the tiles are level and straight. Once the adhesive is completely dry, remove the wooden battens.
Continue to Cut and Lay the Remaining Tiles
Measure the distance between the last tile and the wall. Mark the gap measurement on the tile, then scour the line before snapping it. Repeat the process for the remaining tiles.
Lay the cut tiles the same way as the whole tiles, starting at the bottom of your main design.
Grout the Tiles
The grouting guide has all the details. However, once the adhesive is completely dry, mix the grout with a grout float and work it into the joints between the tiles. Use a grout finishing device to smooth out the joints.
How do I plan a wall tile layout?
It’s crucial to research before planning your wall tile layout.
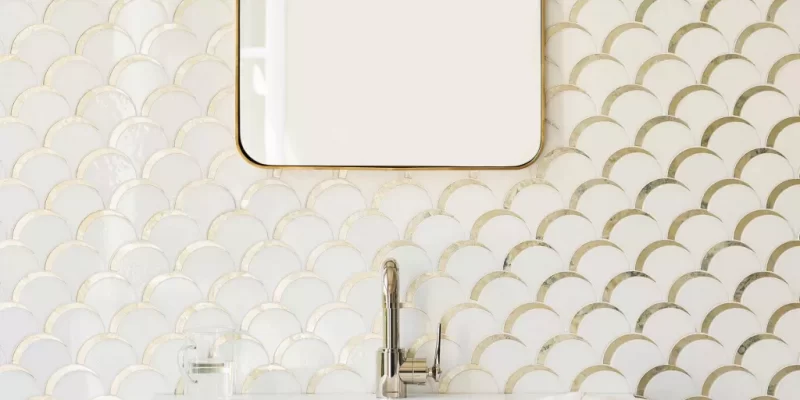
Take time to consider the style you want to achieve. Wall tiles come in many shapes, sizes, colors, and finishes.
There is a wide variety of tile patterns. Carol Butsko says that a rectangular standard format field tile can create different looks depending on its layout. Pattern options include brick, herringbone, and straight joint. The patterns are easy to achieve and rely more on aesthetics than installation ability.
You should also consider the size of the room. YousefMansuri, the head of design for CP Hart (opens in a new tab), explains that a large format tile is recommended if you have a small space and need ideas for small bathroom tiles. It’s because the wall will appear larger with fewer grout lines.
What is the best material for wall tiles?
Porcelain tiles are an excellent option for kitchen and bathroom walls. They’re also famous for tile shower ideas. This tile is practical as it is nearly waterproof and can withstand the room’s humidity.
They are stylish and in keeping with many current a data-component= “Inline Links” href= “https://www.homesandgardens.com/news/bathroom-trends-203661”>bathroom trends/a>, but they’re also easy to wipe clean and maintain for years to come. They are stylish and go with many of the current bathroom styles. They’re also easy to clean and maintain for years to come.
Carol Butsko adds, ‘The technology available to porcelain allows for designs and patterns that are impossible with other materials.
What other materials could you consider? Carol says the natural stone is available in various colors, veining, and opacity. With glazed, double-fired porcelain, you can choose from a wide range of colors. Glass also offers a wide range of colors and rich transparency.
What is the best place to start when tiling a wall?
You need to determine your starting point before tiling the wall. This is shown in the above step-by-step. This is done to ensure you use as many tiles as possible.
If the corner space is less than half a full tile, move the tile gauge to the right by half the width. It is done to create a neater finish by allowing space to fit a larger tile. Carol Butsko says that the starting point affects the final point. It is, therefore, essential to consider this to get the best results. Placement may require some adjustments for vanities or tubs in the area.


Comments