
Bond cleaning, also known as end-of-lease cleaning, is a crucial step in the rental process. It’s not just about cleaning; it’s about ensuring that the property is in pristine condition for the next tenant and securing the return of your bond. This comprehensive guide will walk you through the essentials of bond cleaning, offering practical tips and a step-by-step approach to achieve a spotless result.
Understanding Bond Cleaning
Bond cleaning refers to the thorough cleaning required at the end of a rental period to ensure that the property meets the standards set by the landlord or property manager. The goal is to return the property to its original condition, which is often outlined in the lease agreement. This can involve deep cleaning tasks that go beyond regular cleaning routines, including carpet cleaning, window washing, and more.
Why Bond Cleaning is Important
- Return of Bond: A clean property increases the likelihood of receiving your full bond back. Landlords often retain a portion of the bond for cleaning if the property isn’t left in a satisfactory state.
- Property Condition: Proper cleaning helps maintain the property’s condition, which can prevent disputes and ensure the next tenant finds it in excellent shape.
- Lease Agreement Compliance: Most leases require tenants to return the property in a condition similar to when they moved in. Bond cleaning is essential for meeting these contractual obligations.
Essential Bond Cleaning Tasks
Here’s a detailed breakdown of the bond cleaning process:
1. Create a Cleaning Checklist
Start by making a comprehensive checklist. Include all the areas and tasks that need attention. A typical checklist might include:
- Kitchen: Clean oven, stovetop, microwave, and rangehood. Wipe down all surfaces and cabinets. Clean sink and tap fittings. Remove any grease or stains from walls and floors.
- Bathrooms: Scrub tiles, grout, and shower screens. Clean toilet, sink, and taps. Remove any mould or mildew. Polish mirrors and fixtures.
- Living Areas: Dust and wipe down all surfaces, including skirting boards, light fittings, and vents. Clean windows and window sills. Vacuum carpets and mop floors.
- Bedrooms: Dust and wipe surfaces. Clean under beds and other furniture. Vacuum carpets or clean floorboards.
- Laundry: Clean washing machine and dryer, if applicable. Wipe down surfaces and clean laundry tub.
2. Gather Cleaning Supplies
Ensure you have all necessary cleaning products and tools. This might include:
- General-purpose cleaner
- Glass cleaner
- Oven cleaner
- Carpet cleaner
- Mould remover
- Microfiber cloths
- Sponges and brushes
- Vacuum cleaner
- Mop and bucket
3. Tackle the Kitchen
The kitchen is often the most challenging area. Focus on:
- Oven and Stovetop: Use a degreaser to tackle built-up grime. For ovens, a specific oven cleaner can make this job easier.
- Cabinets and Drawers: Empty and clean inside and out. Wipe down all surfaces.
- Sink: Scrub the sink and taps to remove stains and build-up.
4. Deep Clean the Bathrooms
Bathrooms require attention to detail:
- Shower and Bath: Use a suitable cleaner to remove soap scum and limescale.
- Toilet: Clean both the bowl and the exterior. Ensure it is thoroughly disinfected.
- Tiles and Grout: Scrub tiles and grout to remove any dirt or mould.
5. Clean Living Areas and Bedrooms
For living areas and bedrooms:
- Dusting: Dust all surfaces, including hard-to-reach areas.
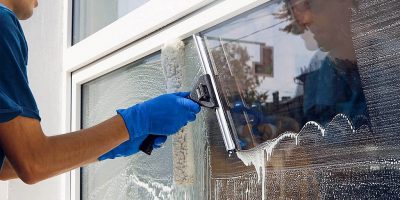
- Windows: Clean windows and remove any streaks. Don’t forget window sills and tracks.
- Floors: Vacuum carpets thoroughly. If you have hardwood or tiles, mop them after dusting.
6. Laundry Room
In the laundry room:
- Clean Appliances: Wipe down the exterior of the washing machine and dryer.
- Laundry Tub: Scrub the laundry tub to remove any stains or build-up.
7. Final Touches
Do a final check to ensure:
- All surfaces are clean and free from dust or stains.
- Appliances are clean and functioning.
- Any damage or maintenance issues are reported, if necessary.
Tips for Effective Bond Cleaning
- Start Early: Begin cleaning well before your lease ends to avoid a last-minute rush.
- Use the Right Products: Use cleaning products suitable for each surface to avoid damage and achieve better results.
- Pay Attention to Details: Small details, such as wiping light switches and door frames, can make a big difference.
- Seek Professional Help: If the task seems overwhelming, consider hiring a professional Bond Cleaning Services in Auckland. Professionals have the experience and equipment to ensure a thorough clean.
- Document the Condition: Take photos of the property once cleaning is complete. This documentation can be useful in case of disputes.
Conclusion
Bond cleaning is a significant task that requires thoroughness and attention to detail. By aforementioned this guide, housekeepers and tenants can ensure that they meet their lease obligations and improve their chances of receiving their full bond back. Whether you choose to tackle the cleaning yourself or hire professionals, understanding the key aspects of bond cleaning will help you navigate this essential part of the rental process with confidence.


Comments