Introduction
Low voltage wire splicing is a fundamental skill for anyone involved in electrical work. Whether you’re a seasoned professional or a DIY enthusiast, understanding the intricacies of splicing low voltage wires is essential for maintaining safe and efficient electrical systems. In this comprehensive guide, we will delve deep into the art of splicing low voltage wires, covering everything from the basics to advanced techniques. By the end of this article, you’ll have the knowledge and confidence to tackle low voltage wire splicing projects with ease.
What is Low Voltage Wire Splicing?
Before we dive into the technical details, let’s start with the basics. Low voltage wire splicing involves connecting two or more wires together to ensure the uninterrupted flow of electrical current. Low voltage wires typically carry voltages ranging from 12 to 48 volts and are commonly found in various applications, including home automation systems, automotive wiring, and outdoor lighting.
Why is Proper Splicing Important?
Ensuring Electrical Safety
One of the primary reasons for proper low voltage wire splicing is to ensure electrical safety. Faulty splices can lead to electrical shorts, overheating, and even fires. By following the correct splicing techniques, you minimize the risk of accidents and protect both property and lives.
Maintaining System Reliability
Reliability is key when it comes to electrical systems, especially in critical applications like security systems or outdoor lighting. Proper splicing ensures that your connections are secure and will withstand environmental factors, preventing system failures and costly repairs down the line.
Types of Low Voltage Wire Splicing
There are several methods for splicing low voltage wires, each with its own advantages and use cases. Let’s explore the most common types:
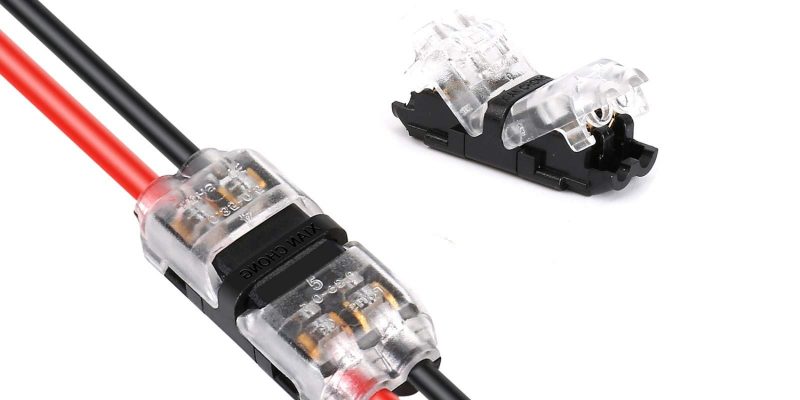
1. Twist-on Wire Connectors
Twist-on wire connectors, also known as wire nuts, are perhaps the simplest way to splice low voltage wires. They work by twisting the exposed ends of the wires together and capping them with a plastic connector. This method is quick and easy, making it suitable for simple electrical connections.
2. Soldering
Soldering is a more permanent and robust splicing method. It involves melting solder onto the exposed wire ends, creating a solid electrical connection. Soldered connections are known for their durability and resistance to vibration, making them ideal for automotive and marine applications.
3. Crimp Connectors
Crimp connectors are used by compressing a metal sleeve over the exposed wire ends using a specialized tool. This creates a strong and reliable connection. Crimp connectors are commonly used in electronics and telecommunications.
Step-by-Step Guide to Splicing Low Voltage Wires
Now that you have a basic understanding of low voltage wire splicing let’s walk through the step-by-step process:
Step 1: Gather Your Tools
Before you start, ensure you have the necessary tools and materials, including wire strippers, a soldering iron (if soldering), crimping tools (if using crimp connectors), and safety gear such as gloves and eye protection.
Step 2: Prepare the Wires
Strip the insulation from the ends of the wires to expose the conductors. Be careful not to damage the wires during this process, as it can affect the integrity of the connection.
Step 3: Choose the Splicing Method
Select the splicing method that best suits your application. Twist-on connectors are quick and easy, while soldering and crimping offer more robust connections.
Step 4: Splice the Wires
Follow the instructions for your chosen splicing method to join the wires securely. Ensure that there is a good electrical connection, and double-check for any exposed conductors or loose connections.
Step 5: Insulate the Connection
After splicing, insulate the connection to prevent accidental contact and protect it from environmental factors. You can use heat shrink tubing, electrical tape, or other appropriate insulation materials.
Step 6: Test the Connection
Before finalizing your work, test the connection to ensure it is functioning correctly. This step is crucial to avoid future issues.
Conclusion
Splicing low voltage wires is a critical skill for anyone dealing with electrical systems. By following the proper techniques and using the right materials, you can ensure safety, reliability, and longevity in your electrical connections. Remember to always prioritize safety and adhere to local electrical codes and regulations when working with low voltage wires.
FAQs
- Is it safe to splice low voltage wires without professional training?
While simple splicing tasks can be performed by DIY enthusiasts, it’s essential to have a basic understanding of electrical systems and follow safety guidelines. For complex projects, it’s advisable to consult a professional electrician. - Can I use regular electrical tape for insulating low voltage wire splices?
While regular electrical tape can be used for insulation, it’s recommended to use heat shrink tubing for a more secure and durable connection. Heat shrink tubing provides better protection against environmental factors. - What precautions should I take when soldering low voltage wires?
When soldering low voltage wires, work in a well-ventilated area, wear safety goggles, and be cautious of hot soldering irons. Ensure that the soldered connection is neat and does not have any cold solder joints, which can lead to poor conductivity.
In conclusion, mastering the art of splicing low voltage wires is a valuable skill that enhances electrical safety and system reliability. Whether you’re a DIY enthusiast or a professional electrician, following the correct procedures and using the right tools will ensure successful and long-lasting splices. So, go ahead and tackle your low voltage wire splicing projects with confidence.


Comments